插件
时间线
采用了 @HanochMa 的项目
仓库:https://github.com/HanochMa/vitepress-markdown-timeline
Demo:https://hanochma.github.io/daily/2023-04
pnpm add -D vitepress-markdown-timelineyarn add -D vitepress-markdown-timelinenpm install vitepress-markdown-timelinebun add -D vitepress-markdown-timeline在 config.mts 中注册 markdown 解析插件
import timeline from "vitepress-markdown-timeline";

export default {
  markdown: {
    //行号显示
    lineNumbers: true,

    //时间线
    config: (md) => {
      md.use(timeline);
    },
  },
}在 .vitepress/theme/index.ts 中引入时间线样式
说明
如果你没有这个文件,就自己新建
// .vitepress/theme/index.ts
import DefaultTheme from 'vitepress/theme'

// 只需添加以下一行代码,引入时间线样式
import "vitepress-markdown-timeline/dist/theme/index.css";

export default {
  extends: DefaultTheme,
}最后我们在markdown文件中,按格式使用即可
输入:
::: timeline 2023-04-24
- 一个非常棒的开源项目 H5-Dooring 目前 star 3.1k
  - 开源地址 https://github.com/MrXujiang/h5-Dooring
  - 基本介绍 http://h5.dooring.cn/doc/zh/guide/
- 《深入浅出webpack》 http://webpack.wuhaolin.cn/
:::

::: timeline 2023-04-23
:::输出:
- 一个非常棒的开源项目 H5-Dooring 目前 star 3.1k
- 《深入浅出webpack》 http://webpack.wuhaolin.cn/
图片缩放
Vuepress是可以直接安装插件 medium-zoom 的,非常好用
但是Vitepress直接用不了,在 vitepress的issues中找到了方法#854
pnpm add -D medium-zoomyarn add -D medium-zoomnpm install medium-zoombun add -D medium-zoom在 .vitepress/theme/index.ts 添加如下代码,并保存
// .vitepress/theme/index.ts
import DefaultTheme from 'vitepress/theme'

import mediumZoom from 'medium-zoom';
import { onMounted, watch, nextTick } from 'vue';
import { useRoute } from 'vitepress';

export default {
  extends: DefaultTheme,

  setup() {
    const route = useRoute();
    const initZoom = () => {
      // mediumZoom('[data-zoomable]', { background: 'var(--vp-c-bg)' }); // 默认
      mediumZoom('.main img', { background: 'var(--vp-c-bg)' }); // 不显式添加{data-zoomable}的情况下为所有图像启用此功能
    };
    onMounted(() => {
      initZoom();
    });
    watch(
      () => route.path,
      () => nextTick(() => initZoom())
    );
  },

}点击图片后,还是能看到导航栏,加一个遮挡样式
在 .vitepress/theme/style/var.css 中加入如下代码,并保存
/* .vitepress/theme/style/var.css */

.medium-zoom-overlay {
  z-index: 20;
}

.medium-zoom-image {
  z-index: 9999 !important;/* 给的值是21,但是实测盖不住,直接999 */
}测试一下效果,还不错
但是
有个小bug,每次修改完需要刷新才能起效,不过不影响使用

评论
评论的插件比较多:
从个人角度而言,Giscus 最佳,就用它演示,其他的这里就不赘述了
关于 @xinlei3166 的 waline 插件
// .vitepress/theme/index.ts
import DefaultTheme from 'vitepress/theme'

import { useWaline } from 'vitepress-theme-website'

export default {
  extends: DefaultTheme,

  setup() {

    useWaline({
      serverURL: 'https://you_url.com'
    }),

  }
}记得 serverURL 换成自己的即可,但是作者的插件有个bug,暗黑模式下看不清字
安装giscus
Giscus 是一个基于 GitHub Discussion 的评论系统,启用简便
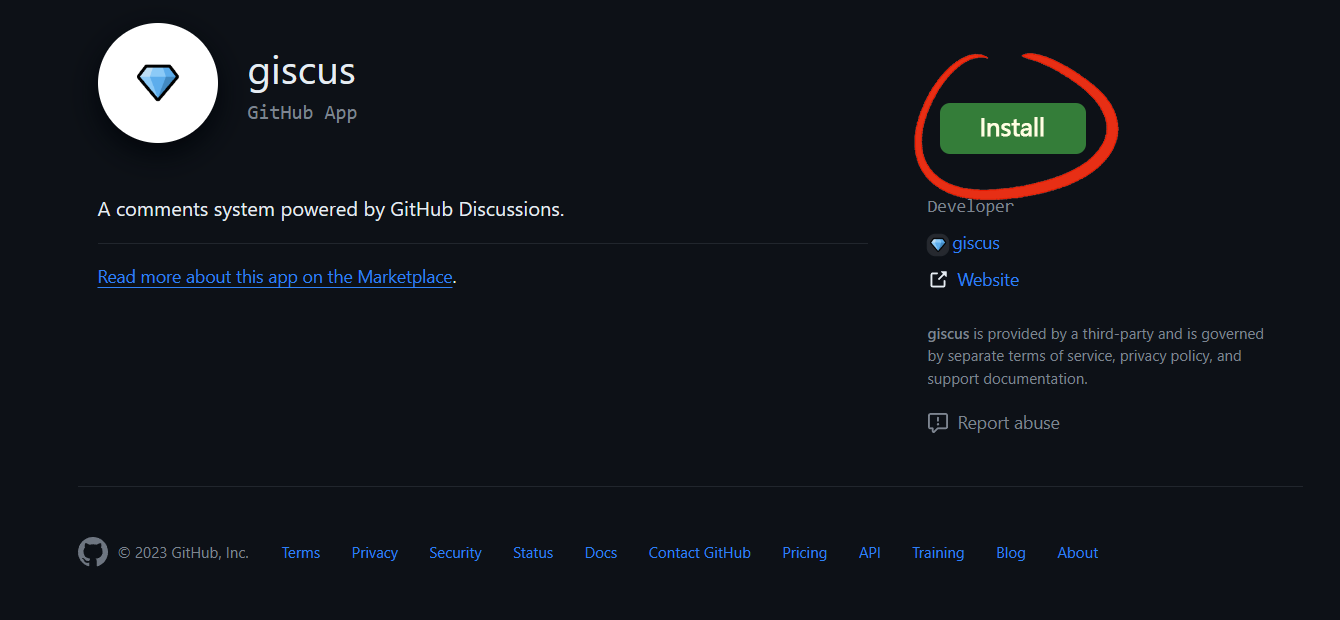
进 Giscus App官网:https://github.com/apps/giscus
点击 Install 安装
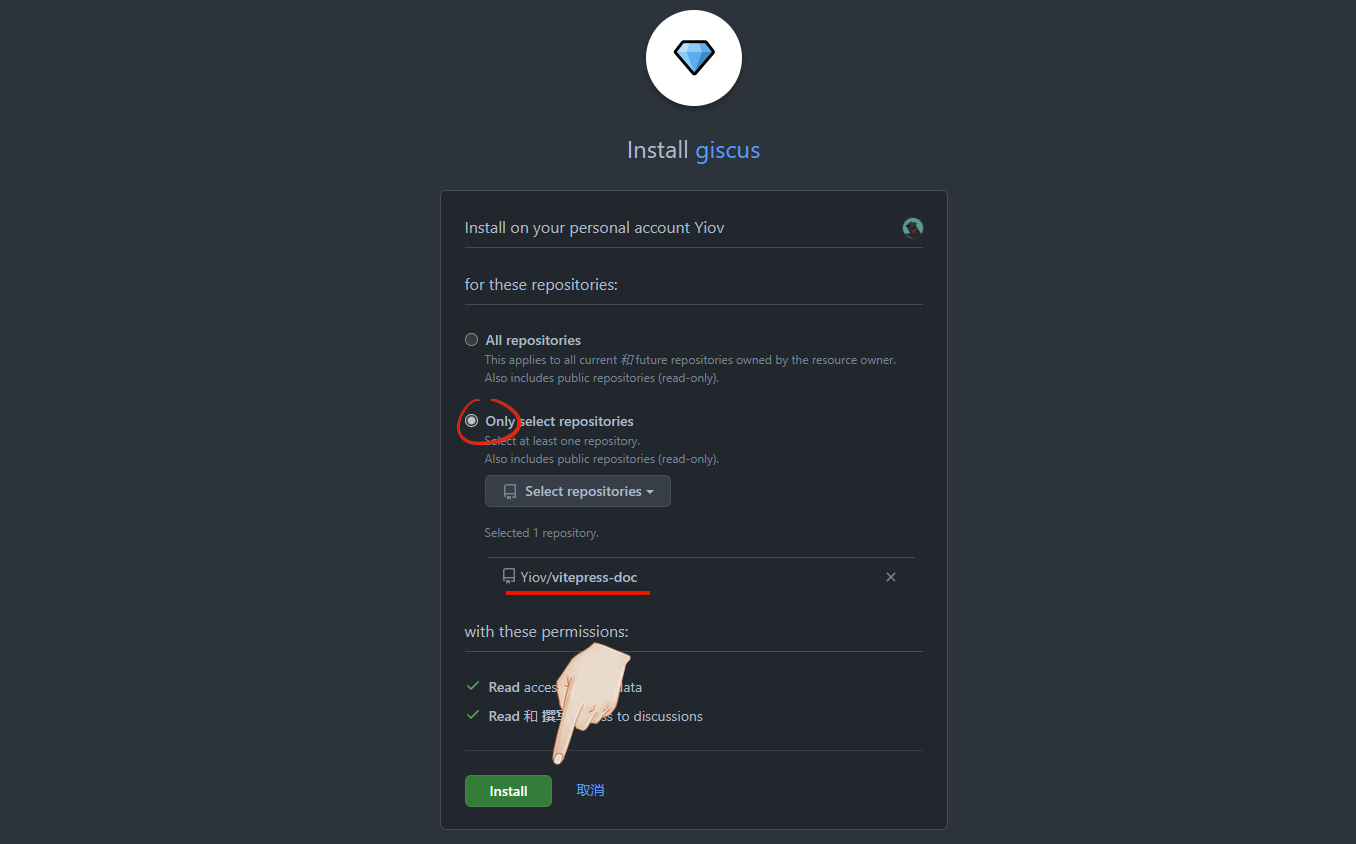
选择 Only select repositories,再指定一个你想开启讨论的仓库
注意
仓库必须是公开的,私有的不行
想单独放评论,新建一个也可
查看
完成后可以在个人头像-设置-应用 Applications 中看到
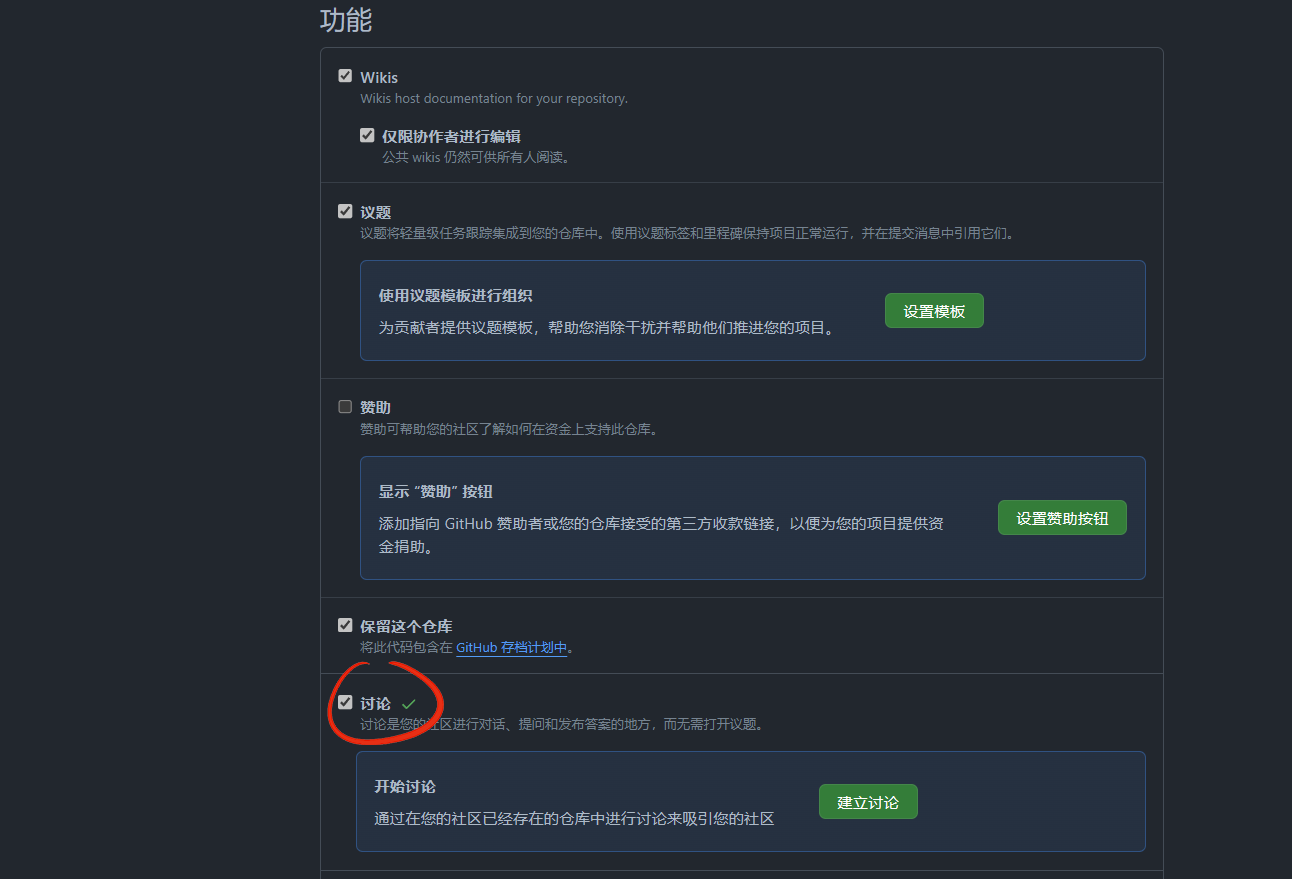
开启讨论
因为giscus会把评论数据都放到讨论 discussions 中
我们进入要开启讨论的仓库,点设置 - 勾选讨论 Settings - discussions
生成数据
输入自己的仓库链接,满足条件会提示可用
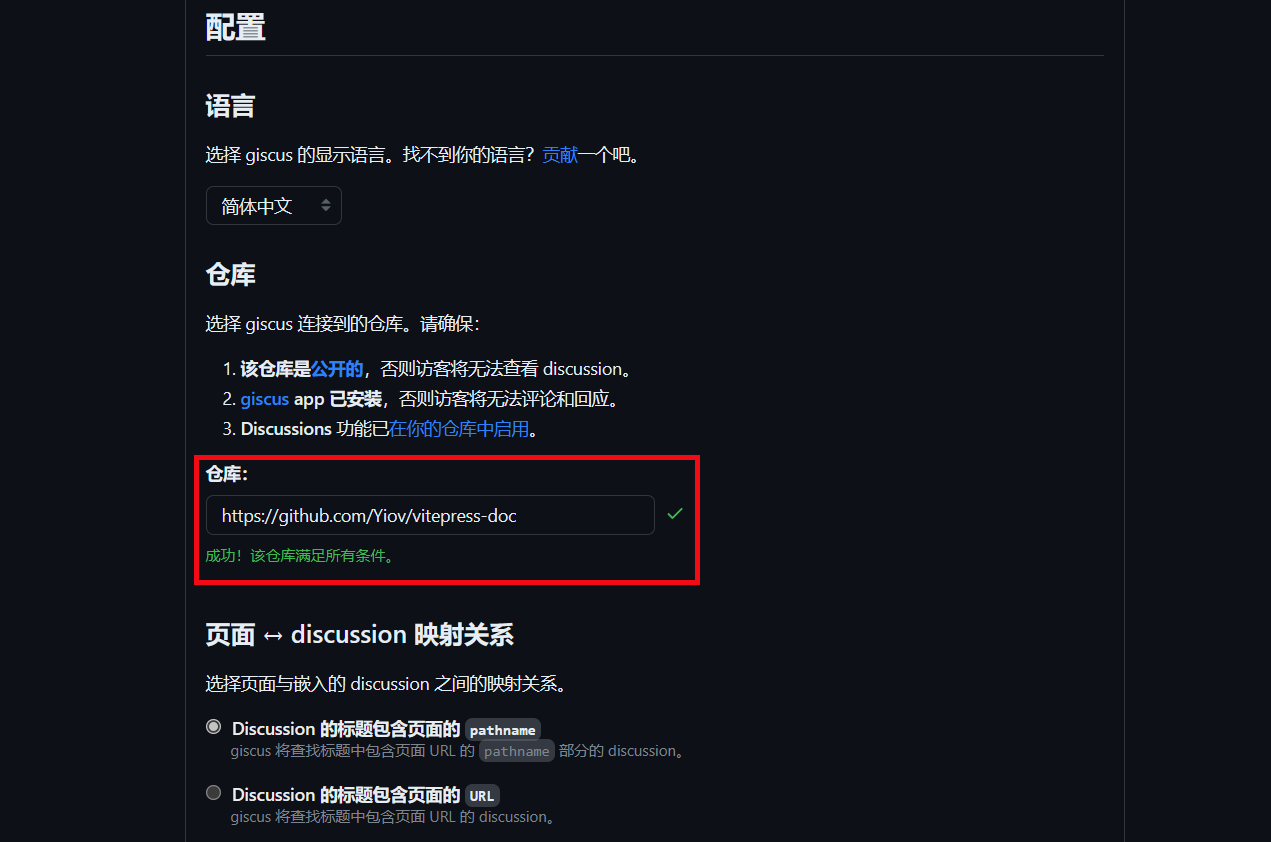
下拉到 Discussion 分类我们按推荐的选 Announcements ,懒加载评论也可以勾选下

下方就自动生成了你的关键数据

其中 data-repo 、 data-repo-id 、 data-category 和 data-category-id 这4个是我们的关键数据
<script src="https://giscus.app/client.js"
        data-repo="Yiov/vitepress-doc"
        data-repo-id="R_******"
        data-category="Announcements"
        data-category-id="DIC_******"
        data-mapping="pathname"
        data-strict="0"
        data-reactions-enabled="1"
        data-emit-metadata="0"
        data-input-position="bottom"
        data-theme="preferred_color_scheme"
        data-lang="zh-CN"
        data-loading="lazy"
        crossorigin="anonymous"
        async>
</script>安装使用
有能力的可以用官方给的js数据封装,我这里用 @T-miracle 的插件
仓库:https://github.com/T-miracle/vitepress-plugin-comment-with-giscus
pnpm add -D vitepress-plugin-comment-with-giscusyarn add -D vitepress-plugin-comment-with-giscusnpm install vitepress-plugin-comment-with-giscusbun add -D vitepress-plugin-comment-with-giscus在 .vitepress/theme/index.ts 中填入下面代码
并将我们之前获取的4个关键数据填入,其他保持默认保存
// .vitepress/theme/index.ts
import DefaultTheme from 'vitepress/theme';
import giscusTalk from 'vitepress-plugin-comment-with-giscus';
import { useData, useRoute } from 'vitepress';

export default {
  extends: DefaultTheme,

  setup() {
    // Get frontmatter and route
    const { frontmatter } = useData();
    const route = useRoute();

    // giscus配置
    giscusTalk({
      repo: 'your github repository', //仓库
      repoId: 'your repository id', //仓库ID
      category: 'Announcements', // 讨论分类
      categoryId: 'your category id', //讨论分类ID
      mapping: 'pathname',
      inputPosition: 'bottom',
      lang: 'zh-CN',
      },
      {
        frontmatter, route
      },
      //默认值为true,表示已启用,此参数可以忽略;
      //如果为false,则表示未启用
      //您可以使用“comment:true”序言在页面上单独启用它
      true
    );

}看下底部的效果吧
如果某一页不想启用
我们可以在当前页使用 Frontmatter 关闭
---
comment: false
---